If you're like me, you like to play imported and burned (backup) copies of PlayStation 2 games. However, “modding” your PS2 requires some careful soldering and the purchase of a modchip to defeat region-locking and copy protection, but in the case of the PlayStation 2, you can actually accomplish the same thing just with a special software disc and by popping open the console's case.
DISCLAIMER: I'm not responsible for any damage to you or your PlayStation 2! Be sure to unplug your console before opening the case if you choose to do so, as there is a risk of electric shock. ⚡️
… Anyway, our goal here is to make it possible to swap the disc in the PlayStation 2's DVD drive without using the eject button in order for this trick to work. ⏏️
What you need
There are a few supplies you'll need to obtain beforehand:
- A copy of SwapMagic, which costs about $25 USD. (No, a self-made burned copy of this will not work.) 📀
- Screwdrivers to disassemble the console: Philips #00, Philips #1 (These have the “+” shaped head.) 🛠
- A small knife, preferably not sharp. 🔪
- A roll of black electrical tape.
- A tiny plastic bag, or something else to store spare leftover screws in afterwards.
… Once you have all of this stuff, you can follow the steps below to open the console. It's not very difficult, and just takes about a half hour! 👍🏻
Steps to make the discs swappable
The whole point of this “mod” as mentioned is to make it so that you can swap the disc out in the system without using the eject button on the console, which would otherwise defeat the bypass that SwapMagic has engineered.
As a reminder, proceed at your own risk. ❗️
- Unplug everything (cables, controllers, memory cards, etc.), and remove the hard-drive and/or network card if one is installed in your console via the expansion bay on the back.
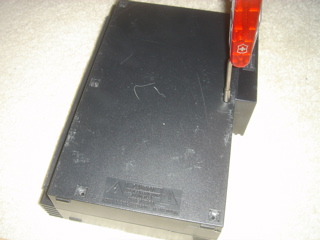
- Use the knife to carefully cut through the small tape label that's holding the two halves of the case together, which signals to Sony that you've opened the case and therefore “voided your warranty.”
- Carefully pry-up the little rubber feet (with the knife or small flat-head screwdriver) on the bottom of the case to expose the screws. There are generally between six and eight of these, depending on which revision of the PlayStation 2 hardware you have. (Place all of the screws in the plastic bag… so that they don't get lost!)
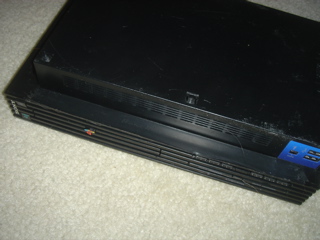
- The top and bottom halves of the case should be easily separable if you completed the last step correctly. — If so, carefully tilt the top-case forward as shown in the next image, but be very careful of the delicate silver ribbon cable that's connected to the “Power” and “Eject” switches mounted in the top-case! (On many consoles, this ribbon cable is taped to the top of the DVD drive with a white sticker, so remove that sticker also.)
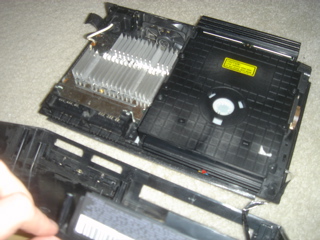
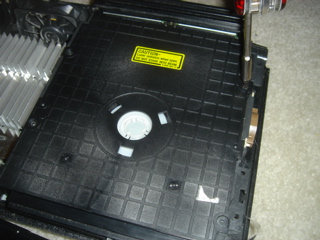
- Remove the four small screws on top of the DVD drive and ensure that the top cover of that is totally removable. (Again, place all of the screws in the plastic bag… so that they don't get lost!)
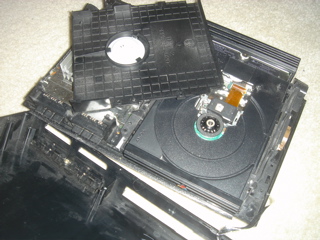
- Now, replace (reinstall) the top-case of the DVD drive and then the top-case of the console into their original positions, but without the screws for either.
- The last step is to discretely apply electrical tape to the case intersections of the console (between the top and bottom-cases) in a way that you can remove some of it as necessary and treat the top-case as a “hinged access door” for swapping discs out by flipping both the case and DVD drive open. You'll definitely want a long piece of tape on the underside between the DVD drive and the USB/iLink ports on the front, as shown below. — You can also replace the little rubber feet on the bottom of the console if you wish afterwards, or store them in the plastic bag alongside the screws.
… And, that's about it! You can now flip the case open whenever you want to swap game discs with SwapMagic. Boot the console, then swap out the SwapMagic disc for your imported discs, and you should be good to go. 😉