Solid-state drives (SSDs) have created serious storage constraints on today's portable computers! — I originally purchased a 128GB MacBook Air in 2011 with the intention of only using it while in class (at school) and for travel, but when I first moved to San Francisco, this machine initially became my primary computer.
Because of its limited storage, I had had to leave behind the majority of my multimedia on my older desktop machine (i.e. my music collection, photos and videos from traveling, etc.)… and only recently (this weekend) have I been able to solve this problem and reconcile everything.
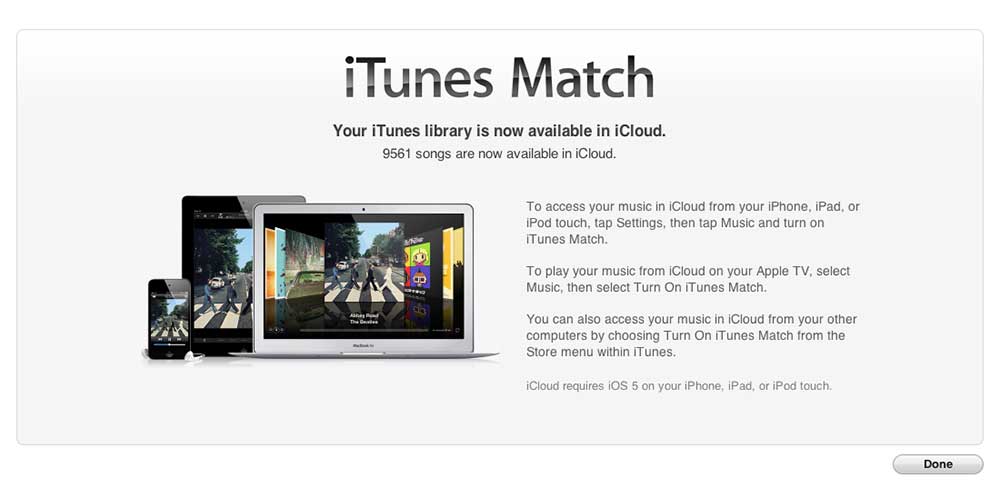
The temporary bandage for this situation had previously been hosting my entire music collection “in the cloud” using Apple's iTunes Match service ($24.99 USD per-year)… but then, I started having terrible problems with eye-strain while using the tiny computer on a regular basis.
I'd never had issues with my eyes before, but the tiny 11.6-inch display was causing me to “see double” after using it for several hours at a time. 👀 — After visiting two eye doctors in a row with no conclusive explanation, I ended-up just replacing the computer under suspicion with a 15.4-inch “Retina” MacBook Pro.
The main driver of this purchase was the fact that I'd found using my Retina iPad (3rd generation) was much more comfortable, and I'd hoped that the larger and higher-density screen on the MacBook Pro (which was also Retina) would help solve this. — Luckily, it did! 👍🏻
This machine was also so much faster than my 2006 Mac Pro desktop that I decided to migrate solely to portable machines again! — The only problem with this was that the Mac Pro desktop boasted a 2TB RAID array for storage, where as my new MacBook Pro only had a 256GB SSD… equating to just ~12% of the storage capacity of the former.
For over a year after switching to the MacBook Pro, I kept using iTunes Match exclusively for my music because of this. Recently though, Apple revised its MacBook Pro line-up yet again (this being the “Late 2013” revision), and these updates brought along the option for 1TB of SSD storage! — I decided to order this computer, with the plan of reorganizing and clearing out my data thereafter by reconciling it from so many different external storage solutions and eliminating the redundant data sourced from different past machines.
To alleviate storage constraints on my previous MacBook Pro (256GB SSD), I had already bought an external Drobo storage array and crammed it full of 5 x 1TB hard-drives as a semi-permanent backup archive. — On this Drobo, I had put my music collection, raw video footage from the various trips I'd been on, and anything else bulky that I did not need to access very often. I have some backups of the Drobo itself as well, and a live backup of my music “in-the-cloud” through this iTunes Match service.
While still I plan to leave the bulky video files stored externally from now on… with this new computer, I knew that I could finally “undo” the iTunes Match migration and store all of my music locally again! — And, here's how I did that.
iTunes Match strengths and weaknesses
Any Apple devices that you add to iTunes Match will have their music libraries synced and merged with the others for a consistent, single library experience from anywhere. — However, offline playback is not directly available unless some tracks were previously downloaded and are still cached.
The great thing, though, is that it syncs all of the metadata constantly for your music (including star ratings, play counts, and more) between each device… over the air, instantly.
… What's not to like? Well, it's not always the best at actually “matching” your music.
When I'd initially setup iTunes Match, the songs went into the cloud, but many of them were replaced with Apple's own copies… often inconsistently. — I had explicit versions of songs replaced with “clean” versions, album versions replaced with “unplugged acoustic” or “cover” versions that were sung by someone else, and other times songs didn't even “match” or upload at all.
These inconsistencies and variances are annoying, so it's nice to have an exact copy of your original music library stored on your local machine for the longterm. — It's also nice to still use iTunes Match as a backup service, and for your iPhone to have “on-the-go” downloading of any tracks in your library.
Compiling an iTunes Library from 4 past computers
TL;DR (so far)— I've had one iTunes Library that I've juggled simultaneously between these various computers in the past few years:
- Pre-Intel: The original 17-inch PowerBook G4 from 2003
- Apple switches to Intel: 2006 Mac Pro desktop, 2006 MacBook (white) laptop
- Late 2011: 2006 Mac Pro desktop, 2011 MacBook Air
- Early 2012: 2006 Mac Pro desktop (temporarily), 2012 MacBook Pro
- Late 2013: 2013 MacBook Pro
… I'd already sold all of the computers except for the last one mentioned, but still had iTunes Match running, and an external USB drive with an archive of my Mac Pro's former iTunes Library… which had also been synced to iTunes Match at the time.
Merging these two libraries now using the iTunes Match metadata only was not so easy, though. — iTunes manages song listening habits and songs' individual metadata (such as the dates on which various songs were added) in a proprietary manner.
Also, the thought of my well-organized music library being permanently replaced with a computerized set of possible mismatches from iTunes Match was dreadful, so my choice was actually to stick completely with my locally archived copies of songs.
Taking another iTunes Library archive and merging it into your current library
The trick to re-merging your iTunes libraries later using iTunes Match is to download the entire library locally, and then use this configurable AppleScript that I've written (below) to replace each file's path with the local equivalent in your externally archived iTunes media folder(s).
Disclaimer: I am not responsible for any damage to your iTunes Library, nor any lost music or anything resulting from any of the code or instructions posted here.
set MatchPath to "/Users/your username/Music/iTunes/iTunes Cloud Download/Music/" # the temporary location of your iTunes Library for the cloud downloads only (to replace with your external library's files instead)
set ExternalPath to "/Volumes/your external drive/iTunes/iTunes Music/"

tell application "iTunes"
	log "Starting..."

	set s to selection
	repeat with c in s
		set p to POSIX path of (get location of c)

		if p starts with MatchPath then
			set p_new to ExternalPath & characters ((length of MatchPath) + 1) thru -1 of p as string
			set p_new_nosuffix to characters 1 thru ((length of p_new) - (((offset of "." in (reverse of text items of p_new as string))))) of p_new as string

			set p_new_found to null

			tell application "System Events"

				if (exists disk item (my POSIX file (p_new_nosuffix & ".mp3") as string)) and ((get size of disk item (my POSIX file (p_new_nosuffix & ".mp3") as string)) is greater than 10240) then
					set p_new_found to p_new_nosuffix & ".mp3"

				else if (exists disk item (my POSIX file (p_new_nosuffix & ".m4a") as string)) and ((get size of disk item (my POSIX file (p_new_nosuffix & ".m4a") as string)) is greater than 10240) then
					set p_new_found to p_new_nosuffix & ".m4a"

				end if

			end tell

			if p_new_found is not null then
				log p & " => " & p_new_found
				set location of c to POSIX file p_new_found

			else
				log "! " & p

			end if

		else
			# log "."

		end if

	end repeat

	log "Done scanning!"
end tell
Preface: This is not for the faint of heart. It's for the technically savvy perfectionist only. It requires a lot of bandwidth, time, and disk space. — If you don't have enough local disk space, you'll need an extra external drive… at least temporarily. The results should be perfect, though, if you can perform these steps correctly.
At first, I had tried writing a shell script that would go through the iTunes XML file and change all of the paths for the “Remote” files to their local equivalents. — This actually did work, but was honestly only a last resort because it would reset things like the “Date Added” metadata for each song (which would instead be set to today's date when iTunes attempted to “recover” each song from that file). It would also reset your iTunes window settings and preferences. Not ideal!
Since my hackerish backdoor attempt didn't work… I was left researching an alternative. Fortunately, I discovered that one can change the file path of a song on a live iTunes Library using AppleScript! — Therefore, in theory, I knew that I could write an AppleScript to go through my entire latest iTunes Library and look for matching files in an external library's iTunes media folder. Unfortunately, the files would first have to be stored locally first for this option to work via AppleScript… meaning that one would have to download every single iCloud version of a song before running the AppleScript in order to simply change the path name to something else locally thereafter. 😕
Preparing for the AppleScript
Disclaimer again: Let me re-emphasize that this is 100% at your own risk! — Please read the code before running it, and configure it properly. These were the steps that I followed to get the results that I wanted, but your results may vary.
- Make a backup of your “iTunes Library.itl” and XML files from your iTunes folder, just in case.
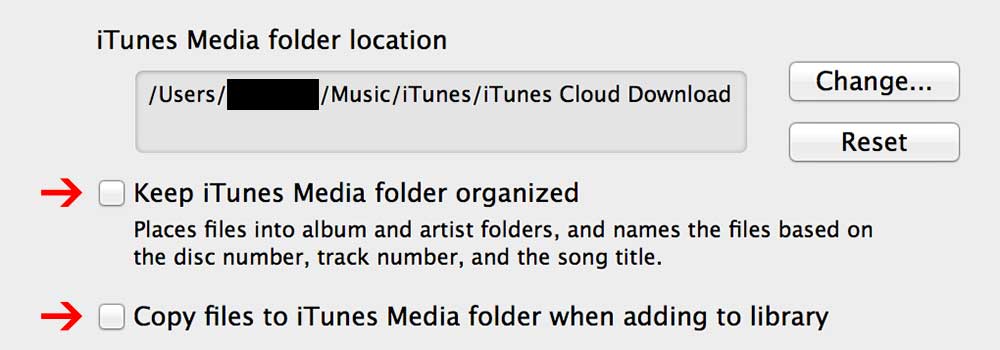
- Go into your iTunes Preferences, and click “Advanced” at the top. For me, I had the standard “iTunes Media Folder” selected, and the two boxes below were checked to keep my music folders organized as well. Change this folder to something else (a new folder that's temporary… it can be on an external drive!) and uncheck these two boxes below as well. Don't worry, at the end we'll change all of this back! — If you had a pre-existing non-standard iTunes Media folder location (not the default) … make a note of what it is now before changing it so that you can change it back after.
- This next step will take a while. After the previous step is completed, select all of the songs in your iTunes Library, click the “File” menu, then “New”, and finally the “Playlist from Selection” option. Right-click the new playlist that you've just created in the sidebar, and hit “Download” to download all of the tracks to your local system and store them in that temporary media storage folder that you had just configured in the previous step.
- Once completed, make another separate backup of your “iTunes Library.itl” and XML files from your iTunes folder, just in case.
- Finally, configure and run the AppleScript above with the paths of your temporary iTunes media folder (for the iCloud downloads made in Steps 2 and 3) and your external media folder that you wish to merge into your active iTunes Library. You should be able to run this script on as many different past computers' iTunes media folders as you'd like to fill in any missing files on your local iTunes Library. (Do this just by reconfiguring the second folder at the top of the AppleScript to that computer's iTunes media path if it is available on an external drive, or wherever.) — The script will automatically check to see if any previously “iCloud-only” songs are available in the configured external folder and then switch the iTunes version to then reference those files instead of the temporary iCloud-only copies that you downloaded in Step 3! Check the log/output of the AppleScript afterward using the “Results” section at the bottom of the AppleScript Editor window to be sure that no files are erroring out or if any are still “not found.”
- After you've run the AppleScript successfully, run it a few more times to be sure that no additional files show up with a “!” next to them in the logging/results/events window area. If more files show up, rename them within your externally archived iTunes media folders (using the Finder) to match the exact directory structure that the AppleScript above looks for based on your configuration. This is also based on iTunes' own directory structure and usually consists of the current artist, album, and track name in your active iTunes Library. The script will automatically reassign the tracks to the ones in that external location… only as necessary, and even on subsequent runs.
If you have any remaining iTunes Match downloaded music files that could not be replaced with externally archived versions successfully, you may choose to leave them as-is and iTunes will permanently use the iCloud-sourced versions following our final steps below. I would save the output of the AppleScript in this instance by copying and pasting the results that are shown in the AppleScript Editor window (at the bottom where it says “Results”) into a text-file to have a record of which files had failed to be reassigned to archived local versions.
If everything completed successfully, you should have a fully local iTunes Library now. The final steps below involve the actual copying of all of the external music data files from their archived locations into your local storage after reverting the iTunes configuration changes that you had made in the beginning of this whole process. None of the files in your iTunes should reference the temporary library folder (for the iCloud downloads) that you had configured in the initial steps anymore, unless you chose to leave them as-is by ignoring the AppleScript's “!” output for some of them.
Finishing up + moving all of the data into place
With your iTunes Library solely referencing local media, you can finally start tidying things up and finish this migration:
- Go into iTunes' Preferences, click “Advanced”, and revert your iTunes media folder to where you want all of your iTunes Music stored locally after this is finished. — I use the default location, so I simply hit “Reset”. Don't forget to re-check the two checkboxes below that you should have unchecked at the beginning! — Hit “OK” after making these changes, and it should scan through your library for a second or two, and then return you to the main iTunes window without doing much else.
- Now, optionally delete the temporary “iCloud Download” media folder that you had created initially. If no additional files were shown as missing “!” in the AppleScript's results in the previous steps, then none of these files should be referenced any longer by iTunes. This is how you can reclaim significant disk space before this next step, which will import your external media… and use much more of your target disk! — If you didn't verify the AppleScript's results before, or have left some iCloud copies in your library above (if some files couldn't be retrieved from an archive), then you should wait and *not* delete this folder until after the next step. Also, be careful not to delete the wrong folder!
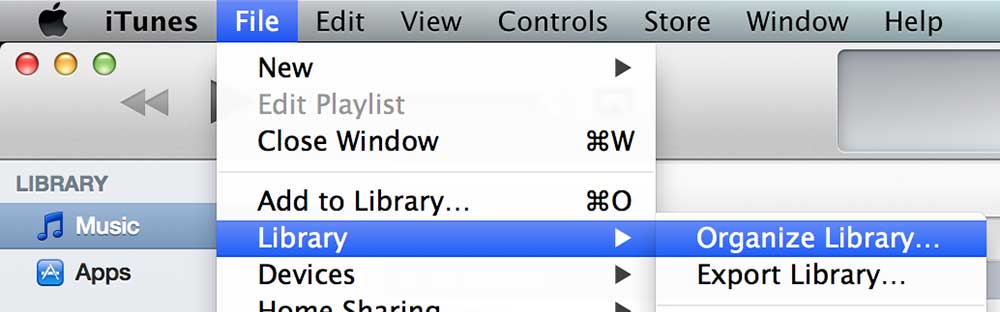
- With your external iTunes Library (or “libraries”) still accessible on the local machine via external storage or what not, go into the iTunes “File” menu, choose “Library”, and then select the “Organize Library” option. — This will begin to copy all of the referenced music back into your chosen iTunes Media folder (in Step 1) from each song's current referenced location. (either on external or internal storage, etc.)
- You should be all set when iTunes finishes organizing your library! Test everything, verify songs' locations within their “Info” screens, and enjoy. — If you didn't delete your temporary “iCloud Download” media folder in Step 2, you can do that now if you want… because iTunes will have moved any remaining referenced files into your newly configured iTunes Media Folder (from Step 1) during Step 3. — You could also keep that folder (if you want), but iTunes won't be using it at all if the previous steps were completed correctly and successfully. Be careful not to delete the wrong folder!
Breathe! …That wasn't so bad, right?
Once you've completed all of these steps properly and verified that all of your music is where you want it to be, a solid “very last step” is to re-run the “Update iTunes Match” option from the “Store” menu in iTunes. — You could also turn iTunes Match off and back on to do a “hard-reset”… although I'd personally wait a few months to make sure that everything's behaving correctly locally first. By doing a hard-reset, Apple could eventually re-match some of your previously mismatched tracks through iTunes Match.
Enjoy your newly reconciled music library! — Also, consider grabbing Google Music Manager and syncing your music (one-way only) to the Android-compatible Google Play service. It's free for up to 20,000 songs… and while it's not as good as iTunes Match, it still offers on-the-go streaming to Android devices.