Wouldn't it be great to be able to play Zelda on your laptop? … Obviously! 😄
Between video-game consoles
Being that I'm between travels, apartments, and dedication to a specific game console, I decided to get creative with hardware and catch up on the Legend of Zelda series developed by Nintendo.
There are a few other titles that I'm looking forward to this holiday season when PlayStation 4 goes on sale, such as The Last Of Us and Grand Theft Auto 5… but, even though these are also PlayStation 3 titles, I don't own that console anymore either, so I can't play either of them right now. 😃
The primary reason that I'm going with the PlayStation 4 over the Xbox One is that I've owned the PlayStation 2 and PlayStation 3 previously. — Most of the console games I've played are on the PlayStation platform, and the new consoles have generally enabled playback of each previous consoles' titles through streaming or embedded backwards compatibility.
The only other home (non-portable) gaming console that I've dabbled with longterm is the Nintendo Wii, which I actually camped out for on launch in 2006. 😂 — But, I sold my Wii before I moved in 2011, and then bought a PlayStation 3 in early 2012. Then, I sold that before I moved again in January 2013, and have been consoleless ever since due to traveling.
… So, what's next?
Back to Nintendo? Hmm…
Because I'd owned the Wii before, I had already played:
- The Legend of Zelda: Twilight Princess — The initial flagship game of the series for Wii.
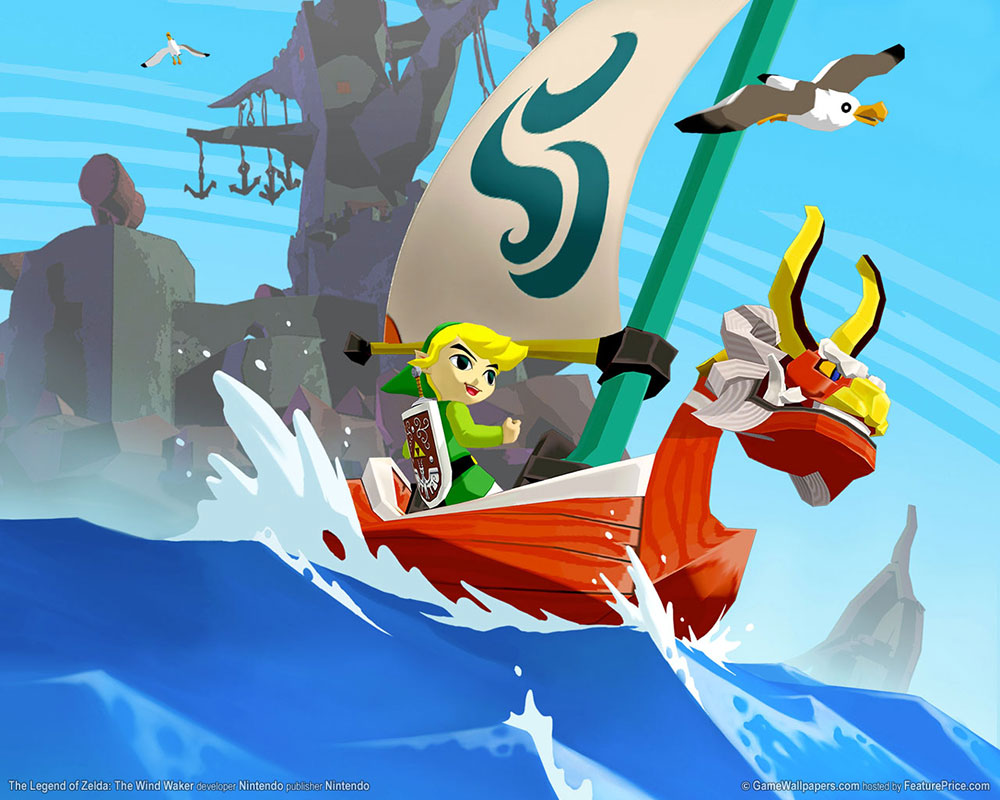
- The Legend of Zelda: The Wind Waker — Because this was originally released for Nintendo GameCube, it could also be played on the Wii console due to backwards compatibility.
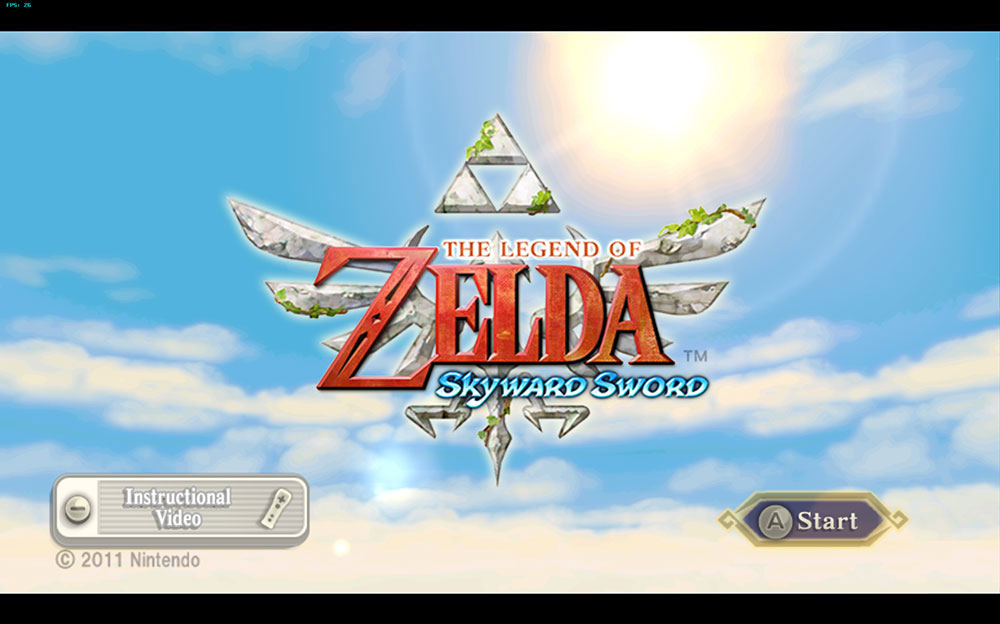
… A new Zelda game had come out since then, called “The Legend of Zelda: Skyward Sword,” and I had been dying to play it.
The fact that I had been able to play a GameCube game on the Wii was a signal that the two were very similar, hardware-wise. — Soon after, I discovered that there's a software emulator that can perfectly emulate both of these Nintendo consoles on most Macs and PCs!
Since my MacBook Pro is fairly new, I'd hoped that it packed enough processing and graphics power to play. — To try, all I needed was a Wii game, a “Wiimote” controller, and a sensor bar.
… But, how was I going to emulate a sensor bar? 😅
Figuring out how to emulate a “sensor bar” for the Wiimote controller(s)
If you have a Nintendo Wii console, you have that wired bar that goes on the top of your TV as a signal to the “Wiimote” controllers of where the TV is. — A friend told me that there are numerous alternatives to this bar, though, such as lighting two candles near your TV (safely! 😅), or even building your own Wii sensor bar using infrared emitter LEDs.

I actually did consider building one myself, but luckily realized that there were a USB-powered replicas on eBay for less than $5 USD shipped. — Radio Shack was unfortunately charging too much for the spare parts to build it on my own (by comparison), and I figured that a manufactured option could potentially be more durable longterm, anyway.
With the sensor bar figured out, I ordered the rest of the supplies through Amazon Prime:
- Nintendo Wii Remote Plus — The “Plus” variant is required to play Skyward Sword.
- Nintendo Nunchuk Controller — You'll also need this to control the character.
… Best perk of buying official Nintendo gear? It always ships with brand-new batteries in the box. That's one thing you won't need to put on your shopping list, for now! 🔋👍🏻
Setup + configuration
After a few days, the supplies had arrived, and it was time to test!
I first downloaded the Dolphin Emulator for Nintendo Wii/GameCube from its official website. — Be careful about other websites that may be offering [perhaps outdated] versions of the software that may come bundled with malware! 😱
While you're on their official site, be sure to check out their game compatibility list and FAQ to make sure that your computer and setup is compatible with Dolphin.

Getting the Wiimote to pair over Bluetooth with my Mac was a bit tricky. — According to the support forums, this latest (at the time of writing) model of the Wiimote controller “RVL-CNT-01-TR” for the newer Wii U console doesn't connect to Macs with the old “hold the 1 and 2 buttons and pair it” method of models prior.
The correct way to connect this controller to your computer is not by connecting the device using the Bluetooth menu on your Mac, as you'd connect any other Bluetooth device. — Instead, follow these steps:
- Open the Dolphin Emulator on your Mac.
- Go to its “Tools” menu.
- Choose “Real Wiimote” for Wiimote 1 controller (not “Emulated Wiimote”)
- Click the “Refresh” button under the “Real Wiimotes” section. Then, immediately press the red “Sync” button on the back of the Wiimote!
… If you're successful, the controller will stop flashing and you'll feel it vibrate briefly to indicate a successful pairing. — It may even appear as being “connected” in your Mac's Bluetooth menu, as shown below:
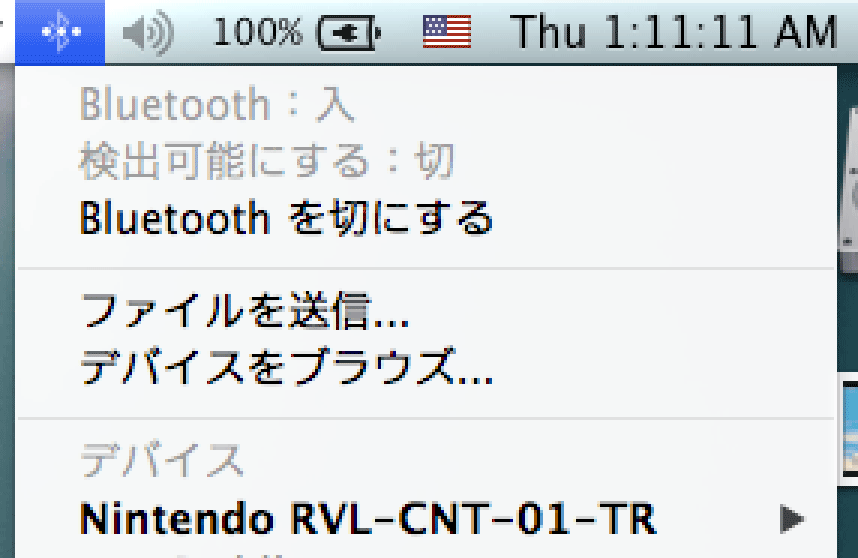
… Even if the controller is listed in your Mac's Bluetooth menu, though, you'll still need to repeat the steps above to reinitiate the connection whenever you reconnect it, as experienced at this time of writing. 😅
“Sensor Bar” alternatives
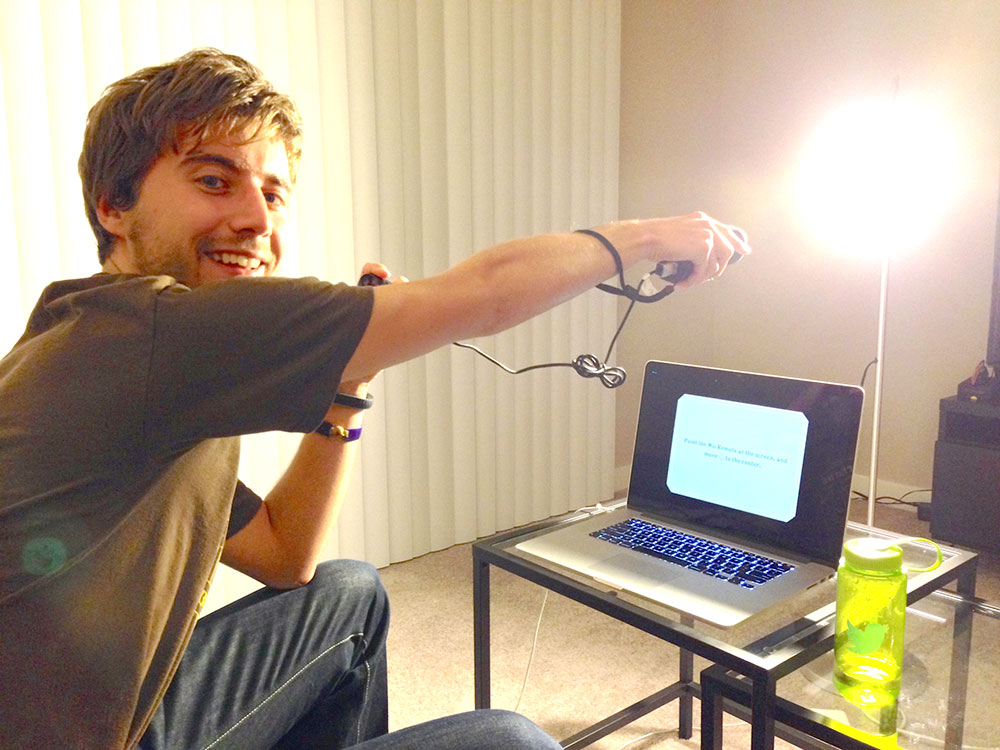
Unfortunately, by the time the controllers and game had arrived, the sensor bar that I'd ordered still hadn't! — However, infrared light is emitted elsewhere (such as from the candles I mentioned before 🕯), so I temporarily just used a bright floor lamp to calibrate the Wiimote when first lauching the game. 😅
Since this game supports (and requires) Wii Motion Plus, you don't really need the sensor bar once it has calibrated. I occasionally would need to reset it if it became off-target while playing, but I could do so in the “Pause” menu to not adversely affect gameplay. — UPDATE (2013/07/27): I eventually just used a disposable lighter 🔥 to emulate the sensor bar briefly when recalibating the Wiimote:

Anyway, moving on… 😅
Launching game(s)
Actually running games in the Dolphin Emulator is easy through options in the software's menus:
- 📂 Open “disk images” of any game discs that you've already created yourself.
- 📀 Or, insert an actual Wii game disc into your computer's CD/DVD drive.
Once the game is running, you should press “Command (⌘) + 1” on your keyboard to enable the first controller, and then “Command(⌘) + F” to make the game fullscreen.
While Wii games are simple to launch, I imagine that there may be a different process for GameCube games given that its discs are physically much smaller than typical CDs/DVDs and therefore might not be safe to insert into your computer's CD drive, especially if it's slot-loading like the MacBook Pro's drives. — For more information on this, check out Dolphin's FAQs.
Improving performance
While actually running Wii games in Dolphin and getting the controllers connected may be “easy,” getting the games to run properly and be responsive is a bit trickier.
This process can vary from game to game. — For “The Legend of Zelda: Skyward Sword”, I found that my frame-rate (before adjusting settings) was initially just 20 FPS! That is not playable or enjoyable, and I began to investigate options to improve the performance.
Dolphin has their own performance guide, but for my particular computer, there were a few things in particular to take into account:
- 4 x CPU cores
- Insane native display resolution for a portable graphics processor to handle (2880×1800)
- The high-end 2013 15-inch MacBook Pro has a discrete GPU for high-performance rendering, alongside the basic Intel GPU that's more power-efficient and generally not used when doing anything intensive. (For this reason, I'm not sure if Dolphin will run well on the 13-inch MacBook Pro or other models with just the Intel GPU.)
… Even with the game running at a super-high display resolution, I actually found that the graphics settings didn't bottleneck Dolphin's performance very much at all on this machine. Instead, it was primarily the CPU that caused performance concerns during emulation!
Recommended settings
I recommend changing the following settings from their defaults for “The Legend of Zelda: Skyward Sword” to get decent playback results and less overall CPU usage on a 2013 15-inch MacBook Pro with discrete GPU.
First, go to the “Settings” menu in Dolphin, and select the “Graphics” option:
- In the “General” tab:
- “OpenGL” for Backend.
- The largest native option (15-inch Retina display is 2880 x 1800) for Fullscreen resolution.
- Enable “Hide Mouse Cursor” to prevent distraction.
- In the “Enhancements” tab:
- “Auto (Window Size)” for Internal resolution, or you may waste system resources doing artificial scaling… especially when switching to an external monitor or TV. 📺
- “None” for Anti-aliasing since you have a “HiDPI” Retina display.
- “16x” for Anisotropic filtering. (I did this for optimal visuals, and haven't notice a performance hit, but you could also try reducing this if you're running into issues.)
- In the “Hacks” tab: (This is where things can get interesting…)
- Enabling “Skip EFB Access from CPU” gave me a huge performance boost, but may cause glitches in some games. (I recommend enabling it unless it causes significant issues for you.)
- Definitely enable “OpenMP Texture Decoder” on the newer MacBook Pro computers, as they have multiple CPU cores and this offers a huge performance boost.
… After this, hit “OK”, and then go back to Dolphin's “Settings” menu, and choose the “DSP Settings” option:
- I enabled the “DSP LLE on Thread” option here, and haven't had any issues. (This is said to boost performance, and it worked well for me.)
… See how these work for you. 👍🏻
In the future, pay attention to specific titles' compatibilities in Dolphin's Wiki! Some games require certain settings for optimal appearance, but individual settings may actually hinder or enhance performance on particular computers or games. — Perhaps, find settings that work for one title, and then see which other games also agree with these settings for optimum playability and enjoyability?
Tip: Also, don't put your computer somewhere where it's poorly ventilated! Various materials or things can block its vents (such as carpets, blankets/bedsheets, papers on a desk, etc.), and will increase the computer's temperature and throttle performance. 🌬
Gameplay vs. visual glitches
Just a heads-up, because the games are being emulated using reverse-engineered code, you may encounter a glitch or two due to evolving algorithms and compatibility in the Dolphin software. 🐬
The only issue that I've encountered in “The Legend of Zelda: Skyward Sword” so far is that certain climbable vines that are supposed to be shown on cliffs aren't visible, and instead it was only rendering shadows of them. 🌱 — The first time I ran into this, I luckily noticed the shadows and was able to keep playing… but without having noticed them, I'd have been stuck at that point in the game with no path forward. 😱
This glitch may in fact be solely caused by my specific system configuration and settings (mentioned above), but your results will most-likely vary between various computers and versions of the Dolphin software.
Tip: As mentioned, pay attention to specific titles' compatibilities in Dolphin's Wiki, and watch out for other issues like this. — The experience is not perfect, but it's not bad either!
Results
… It works! 😃 — I played “The Legend of Zelda: Skyward Sword” entirely from start-to-finish:

… Here's the classic, unforgettable “treasure chest opening” sound and experience… and yes, “#zeldatreasurechest” was an actual hashtag on Vine before I posted this: 🤣
… Pretty cool!
Bonus: Play on a TV!
Since the latest MacBook Pro has a built-in HDMI output, why not hook it up to the TV and play there, instead? 😆
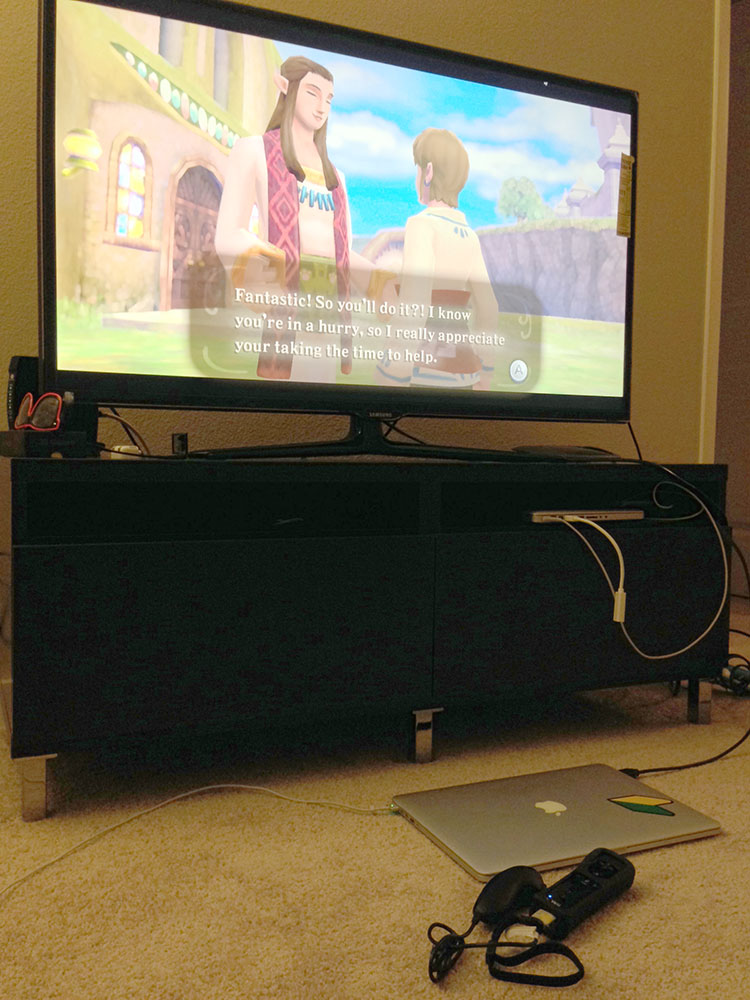
… You might even get better performance, since a 1080p TV is lower resolution than the latest 15-inch MacBook Pro's display panel! 👍🏻
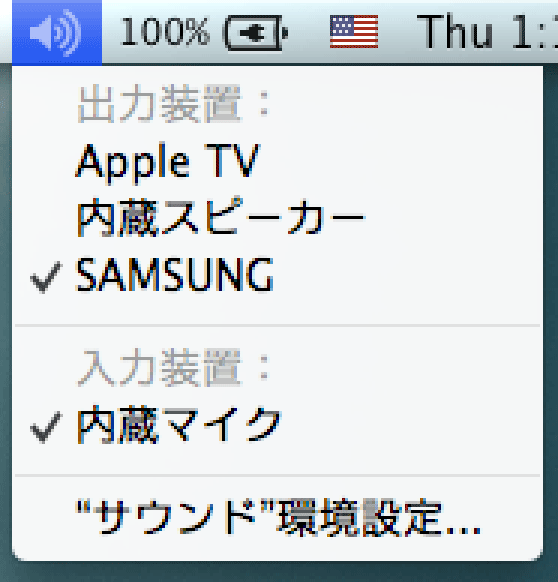
If you want the game's sound to output through the HDMI port (to the TV) as well instead of your Mac's speakers or headphone output, press and hold “Option (⌥)” on your keyboard, click the “volume” icon in your Mac's menu bar, and then choose the TV from the menu that appears:
Wrapping up
So, now I have a working Wii setup on my Mac! 🎮
It suits my console gaming needs for the time being until the PlayStation 4 goes on sale this holiday season, and I'm definitely looking forward to purchasing some new games and consoles from Nintendo in the future, as well. 🤩